
Chocolate Chip Zucchini Bread Easy and Tasty Recipe
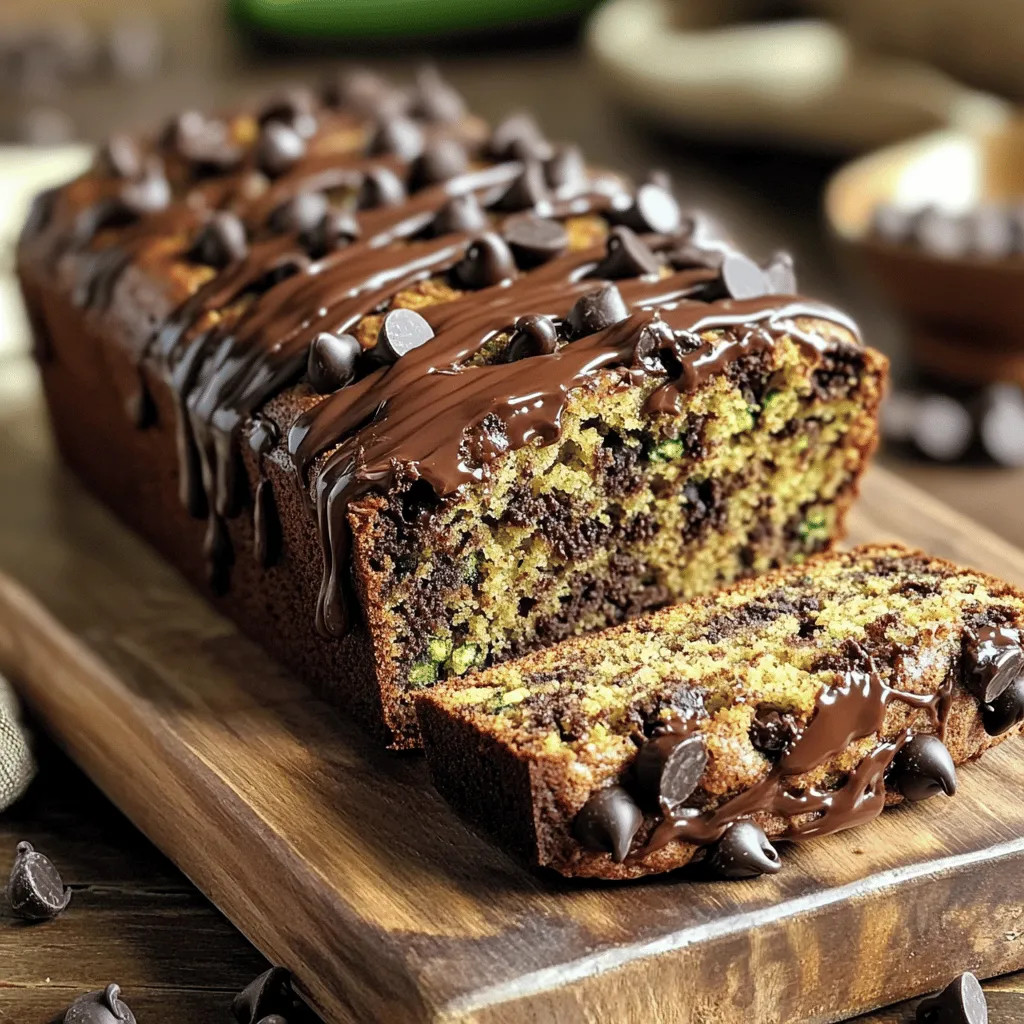
Want to try a moist and tasty treat that’s easy to make? Chocolate chip zucchini bread is the answer! This recipe blends fresh zucchini with rich chocolate chips for a delicious snack. I’ll guide you on choosing the right ingredients, step-by-step instructions, and tips to avoid baking hiccups. Whether you want a classic flavor or healthier options, this post has you covered. Let’s dive in and bake together!
Ingredients
Main Ingredients for Chocolate Chip Zucchini Bread
To make a great chocolate chip zucchini bread, gather these key ingredients:
– 1 ½ cups grated zucchini (about 1 medium zucchini)
– 1 cup all-purpose flour
– ½ cup whole wheat flour
– 1 teaspoon baking soda
– ½ teaspoon baking powder
– ½ teaspoon salt
– 1 teaspoon ground cinnamon
– ½ cup granulated sugar
– ½ cup brown sugar, packed
– ½ cup vegetable oil (or melted coconut oil)
– 2 large eggs
– 1 teaspoon vanilla extract
– 1 cup semi-sweet chocolate chips
– ½ cup chopped walnuts or pecans (optional)
These ingredients work together to create a moist and delicious bread. The zucchini adds moisture while the sugars and chocolate bring sweetness.
Optional Ingredients for Extra Flavor
While the main ingredients shine, you can add a few extras for more flavor:
– ½ teaspoon nutmeg for warmth
– 1 teaspoon orange or lemon zest for brightness
– ½ cup dried fruits, like raisins or cranberries, for chewiness
These optional ingredients can create a unique twist on the classic recipe. Try one or more to see what you like best!
Ingredient Substitutions and Alternatives
If you need to swap ingredients, here are some suggestions:
– Use apple sauce instead of oil for a lower-fat option.
– Substitute honey or maple syrup for granulated sugar.
– Replace all-purpose flour with almond flour for a gluten-free option.
These changes can help you adapt the recipe to fit your needs. Just remember, each swap may change the texture and flavor slightly.
Step-by-Step Instructions
Preparation Steps for the Zucchini
To start, you need to prep the zucchini. Grate one medium zucchini. Use a box grater or food processor for this. After grating, place the zucchini in a clean kitchen towel. Squeeze it to remove extra moisture. This step helps keep your bread from being soggy.
Mixing the Ingredients
Next, let’s mix the ingredients. In a large bowl, whisk together the all-purpose flour, whole wheat flour, baking soda, baking powder, salt, and ground cinnamon. Make sure these dry ingredients are well combined. In another bowl, mix the granulated sugar, brown sugar, oil, eggs, and vanilla extract. Whisk until the mix is smooth. Now, add the grated zucchini to this wet mixture and stir until it blends well. Gradually add the dry mix to the wet ingredients. Stir gently to combine, but don’t overmix; a few lumps are fine! Finally, fold in the chocolate chips and nuts if you like.
Baking and Cooling Process
Now it’s time to bake! Pour the batter into a greased or lined 9×5-inch loaf pan. Spread the batter evenly. Bake in a preheated oven at 350°F (175°C) for 55 to 65 minutes. Check for doneness with a toothpick; it should come out clean. After baking, cool the bread in the pan for about 10 minutes. Then, transfer it to a wire rack to cool completely. Remember, this is where the magic happens, and the flavors deepen!
Tips & Tricks
How to Keep Zucchini Bread Moist
To keep your zucchini bread moist, always squeeze out excess water from the zucchini. This step is key. If you skip it, your bread may turn out soggy. Using fresh, ripe zucchini also helps maintain moisture. Adding a bit of sour cream or yogurt can enhance the bread’s texture. These ingredients add creaminess and keep it soft.
Best Practices for Measuring Ingredients
Measuring ingredients accurately is vital for great results. Use dry measuring cups for flour and sugar. Fill the cup, then level it off with a knife. Do not pack the flour down. For liquid ingredients, use a clear liquid measuring cup and check at eye level. This prevents you from adding too much or too little. Always read the recipe before you start. It helps you gather all ingredients first, making the process smoother.
Troubleshooting Common Baking Issues
If your zucchini bread sinks in the middle, it may be due to overmixing. Mix just until combined; lumps are fine. If the bread is too dense, check your baking powder and baking soda. They should be fresh. Also, ensure you bake at the right temperature. An oven thermometer can help with this. If you find your bread too dry, try reducing the baking time slightly. Each oven is different, so keep an eye on it!

Variations
Gluten-Free Chocolate Chip Zucchini Bread
You can make this bread gluten-free. Use gluten-free flour blends instead of regular flour. These blends often mix rice flour, potato starch, and tapioca flour. This swap keeps the texture light and airy. You can also try almond flour for a nutty flavor. Just remember, the baking time may change. Check it a few minutes earlier to avoid overbaking.
Flavor Enhancements: Spices and Add-ins
Want to jazz up your zucchini bread? Add spices like nutmeg or ginger for warmth. You can also fold in a handful of shredded coconut or chopped dried fruit. These mix-ins add texture and flavor. Try adding a teaspoon of espresso powder to enhance chocolate taste. Each of these options can change the flavor profile and make your bread unique.
Healthier Alternatives: Reduced Sugar and Oil Options
Looking for healthier options? You can cut the sugar by using applesauce or mashed bananas. Both options add natural sweetness. For oil, use unsweetened applesauce or yogurt instead. These swaps keep the bread moist while lowering fat content. You can also consider using a sugar substitute, but be sure to follow the package instructions for best results. Enjoy the delicious taste without the guilt!
Storage Info
How to Store Chocolate Chip Zucchini Bread
Store your chocolate chip zucchini bread in an airtight container. This keeps it fresh and moist. You can also wrap it in plastic wrap. Place it at room temperature for up to three days. If you live in a humid area, the fridge is a better choice. Just remember, it may dry out faster in the fridge.
Freezing Instructions for Long-Term Storage
To freeze the zucchini bread, first let it cool completely. Wrap it tightly in plastic wrap. Then, place it in a freezer-safe bag or container. This helps prevent freezer burn. You can freeze it for up to three months. When ready to eat, thaw it in the fridge overnight.
Reheating Tips for Best Flavor
For the best flavor, reheat slices in the oven. Preheat to 350°F (175°C). Place the slices on a baking sheet. Heat for about 10 minutes or until warm. You can also use a microwave. Heat for 15-20 seconds per slice. Enjoy your warm chocolate chip zucchini bread!
FAQs
Can I use frozen zucchini for this recipe?
Yes, you can use frozen zucchini. Just thaw it first and drain any extra water. This helps keep your bread from getting soggy. Frozen zucchini works well because it’s already grated.
How can I tell when the zucchini bread is done baking?
To check if your zucchini bread is done, insert a toothpick into the center. If it comes out clean, the bread is ready. It should also feel firm and spring back when touched.
What are the best ways to serve chocolate chip zucchini bread?
You can serve zucchini bread warm or at room temperature. It’s great on its own or with butter. You can also add cream cheese or a drizzle of chocolate for extra flavor.
Is it necessary to squeeze out the moisture from zucchini?
Yes, squeezing out the moisture is important. It keeps the bread from being too wet. Just wrap the grated zucchini in a towel and squeeze gently. This step makes a big difference in texture.
This guide covers all you need for chocolate chip zucchini bread. You learned about essential and optional ingredients, plus how to mix and bake. I shared tips to keep it moist and how to avoid common baking mistakes. You explored variations, storage advice, and answers to useful FAQs.
With these insights, you can make a delicious loaf every time. Enjoy your baking journey!


![- 1 cup coconut milk - 1/2 cup almond milk - 1/4 cup chia seeds - 2 tablespoons maple syrup (or honey) - 1 ripe mango, diced - 1/2 teaspoon vanilla extract - A pinch of salt - Optional toppings: shredded coconut, sliced almonds, fresh mint leaves To make Mango Coconut Chia Pudding, gather these ingredients. First, the coconut milk adds richness. Almond milk gives it a lighter feel. Chia seeds are the star, turning the mix into pudding. Maple syrup or honey adds natural sweetness. The ripe mango brings bright flavor. Vanilla extract enhances the taste, while salt balances it. Optional toppings like shredded coconut, sliced almonds, and fresh mint add crunch and color. With these ingredients, you can create a creamy and tasty treat. Each element plays a role in the final flavor. I find that using fresh, ripe mango makes a big difference. It adds a sweet and juicy bite. If you want to try variations, consider using different fruits or nuts. You can also check the Full Recipe for more details. To start, grab a mixing bowl. In this bowl, combine 1 cup of coconut milk, 1/2 cup of almond milk, 2 tablespoons of maple syrup, and 1/2 teaspoon of vanilla extract. Add a pinch of salt for flavor. Whisk these ingredients together until they blend well. Next, slowly add 1/4 cup of chia seeds to the milk mixture. Stir constantly to avoid clumping. It's important that the seeds mix evenly. After adding them, let the mixture sit for about 10 minutes. This allows the chia seeds to begin absorbing the liquid. Stir again to ensure the seeds are well distributed. Now, cover the bowl and place it in the refrigerator. You should chill it for at least 4 hours or overnight. This step is crucial. It helps the pudding thicken to a creamy, pudding-like consistency. The longer it chills, the better the texture will be. When you're ready to serve, take the chia pudding out of the fridge. Layer it in bowls or glasses. Start with a layer of chia pudding and then add diced mango on top. Repeat the layers as desired. For extra flavor, consider adding optional toppings like shredded coconut, sliced almonds, or fresh mint leaves. These toppings not only enhance taste but also make the dessert visually appealing. Enjoy every bite! - Use full-fat coconut milk for a richer texture. - Stir regularly during the initial thickening phase. To make the pudding creamy, full-fat coconut milk is key. It adds a smooth, rich texture, making each bite delightful. Stirring the mixture often while it thickens helps break up any clumps. This keeps the pudding silky and ensures the chia seeds expand evenly. - Substitute maple syrup with agave nectar for a vegan option. - Incorporate more fruit for added nutrition. If you're vegan, swap maple syrup for agave nectar. It gives a nice sweetness without any animal products. You can also add extra fruit like berries or bananas. This not only boosts nutrition but adds fun flavors and colors, making your pudding even more exciting. - Not allowing enough chilling time. - Adding chia seeds too quickly, causing clumps. One common mistake is not chilling the pudding long enough. Give it at least four hours, or overnight if you can wait. This helps it reach the right, thick texture. Another mistake is adding chia seeds too quickly. If you do this, they may clump together. Always sprinkle them in slowly while stirring to keep things smooth. {{image_2}} You can easily switch up the flavor of your mango coconut chia pudding. Try adding pineapple or passion fruit for a tropical twist. These fruits bring a bright, sweet taste that pairs well with coconut. If you love chocolate, consider mixing in cocoa powder. This gives the pudding a rich, indulgent flavor that is sure to please chocolate lovers. For those with allergies, there are nut-free options. You can use oat milk or soy milk instead of almond milk. Both work great and keep the pudding creamy. If you want to cut back on sugar, try natural sweeteners like stevia or monk fruit. These can give you the sweetness you crave without adding too many calories. How you serve your pudding can make a big difference. Use glass jars to create a layered dessert effect. This not only looks pretty but also adds to the fun of eating. You can also serve it with fresh fruit or granola on the side. These extras add crunch and freshness, making each bite exciting. To keep your chia pudding fresh, store it in an airtight container. Place it in the refrigerator right after making it. This will help maintain its creamy texture and flavor. Chia pudding stays good for up to five days. Make sure to check for any signs of spoilage before eating. You can freeze chia pudding if you want to save some for later. Divide it into small portions and place them in freezer-safe containers. This way, you can enjoy a quick treat anytime. To defrost, move the container to the fridge for a few hours or overnight. Avoid using a microwave, as it can change the texture. When you're ready to eat, stir it well to bring back its creamy consistency. Chia pudding is a simple dish made from chia seeds soaked in liquid. People often use coconut milk or almond milk. Chia seeds are tiny but packed with nutrients. They contain fiber, protein, and healthy fats. Each serving gives you a good amount of omega-3 fatty acids. Chia seeds also help you feel full longer, which can aid in weight control. Plus, they are rich in antioxidants and help with digestion. Overall, chia pudding is a healthy choice for breakfast or a snack. Yes, you can! Chia pudding is great for meal prep. You can make it up to three days ahead. Just store it in an airtight container in the fridge. This keeps it fresh and tasty. To make it easier, layer it in jars for quick grab-and-go meals. Just remember to stir the pudding before serving, as it may settle. You can also add fresh fruit right before eating for the best taste. If you want your pudding sweeter, try adding natural sweeteners. Maple syrup is a great choice, but honey works too. You can start with one tablespoon and taste as you go. If you want more sweetness, add a little more. Another option is to use mashed ripe bananas or pureed dates. These add natural sweetness and a nice flavor. Adjust the sweetness to fit your taste. If mango isn’t your thing, there are many tasty options. You can use diced pineapple for a sweet, tropical twist. Bananas add creaminess and sweetness too. Berries like strawberries or blueberries give a fresh flavor and color. You can also try diced peaches or even kiwi. Each fruit adds its own unique taste to your chia pudding. For the full recipe of Mango Coconut Chia Pudding, visit the [Full Recipe] section above. In this blog post, we explored how to make delicious Mango Coconut Chia Pudding. We covered the ingredients, including coconut milk and chia seeds, and detailed each step. You learned tips for creaminess and ways to vary the recipe. Storing and freezing tips helped ensure freshness. Chia pudding is fun to make and easy to customize. With these steps, you can enjoy a tasty and healthy treat. Experiment with flavors and toppings to make it your own. Happy pudding making!](https://quickdishup.com/wp-content/uploads/2025/05/358c57a7-9d09-42b0-adc9-609572edbf74-768x768.webp)
. {{image_2}} You can easily make this recipe your own. Here are some ideas: - Alternative nuts or seeds: Swap out pecans and almonds for walnuts, cashews, or pumpkin seeds. Each nut adds a unique crunch and flavor. - Using fresh apples instead of dried: If you prefer fresh fruit, dice up a tart apple like Granny Smith. Just add it to the mix just before baking. Want to change up the taste? Try these flavor twists: - Making it a nut-free version: Omit all nuts and add more seeds, like hemp or chia. This makes it safe for those with nut allergies. - Adding chocolate or other fruits: Stir in dark chocolate chips or dried mango. These add a sweet touch and make your granola even more fun. Making this granola fit your diet is easy. Here are some options: - Vegan or gluten-free adaptations: Use maple syrup instead of honey for a vegan treat. Choose certified gluten-free oats to keep it safe for those with gluten sensitivities. - Low-sugar versions: Reduce the honey or maple syrup to cut down on sugar. You can also add more spices like cinnamon to boost flavor without extra sweetness. With these variations, you can create a granola that suits your taste and needs. Check out the Full Recipe for the base to get started! To keep your apple cinnamon granola fresh, use an airtight container. This helps keep out moisture and air. Regular storage bags do not seal as well. If you must use them, double-bag your granola. Store your granola in a cool, dry place. A pantry shelf is perfect. Your granola will stay fresh for up to two weeks. If you see any signs of moisture, toss it out. You can freeze granola for longer storage. To freeze, pack it tightly in an airtight container. Label the container with the date. Granola can last for up to three months in the freezer. When you're ready to use it, take it out and let it thaw. You can leave it at room temperature for a few hours. Or, microwave it in short bursts to speed up the process. Once thawed, use it as you normally would. Enjoy this healthy snack in your yogurt or smoothies! For the full recipe, check out the Apple Cinnamon Granola section above. Homemade granola can last up to two weeks. Store it in an airtight container to keep it fresh. If you want it to last longer, you can freeze granola. Just place it in a freezer bag and remove as much air as possible. Thaw it in the fridge or at room temperature when ready to eat. You can use fresh apples in granola, but they add moisture. This can make the granola clump together and lose its crunch. Dried apples work better since they keep it crispy. If you want to add fresh apples, consider adding them after baking. This way, you get their flavor without altering the texture. Leftover granola is a great topping for yogurt or smoothies. You can also use it in baking. Try adding it to muffins, pancakes, or cookies for extra crunch. Mix it into oatmeal for a hearty breakfast. You can even sprinkle it on salads for a sweet twist. To make this recipe gluten-free, choose certified gluten-free oats. Some brands may process oats with gluten-containing grains. Check labels to ensure they are pure. You can also use gluten-free sweeteners, like maple syrup. This makes the entire recipe safe for those with gluten sensitivities. Granola offers several health benefits. It is high in fiber, which helps digestion. The nuts and seeds provide healthy fats and protein, keeping you full. Oats are known to lower cholesterol and improve heart health. With fruits like apples, you get vitamins and antioxidants, making granola a great snack. You now know how to make delicious apple cinnamon granola at home. We covered the ingredients, step-by-step instructions, and tips for perfecting your granola. Granola is healthy, tasty, and easy to customize. Use fresh apples, substitute nuts, or even make it vegan. Store it right for freshness, and enjoy it in many ways. With this guide, you have all the tools to create your favorite snack. Enjoy your granola journey!](https://quickdishup.com/wp-content/uploads/2025/05/17bc7b61-f164-4b02-8021-b66e555a49e1-768x768.webp)